A Comprehensive Paint by Numbers Instruction for Beginners
Painting by numbers is the simplest way to enjoy the creative process of creating beautiful artworks. Its simplicity and the somewhat mindless yet methodological process can help you relax, de-stress, and even improve your cognitive function. The outcome is almost fool-proof as long as you follow a simple instruction: to match the color by the number provided in the segments. Color by color, number by number, a masterpiece will be revealed in the end. Now, a lot of you may ask, are there any additional instructions that you should follow when you’re painting by numbers? The answer is yes, but they’re optional. They’re more like tips and tricks to make the procedure easier and at the same time, to make your artwork more aesthetically pleasing. So, if you want to have a professional-looking canvas, follow these paint by numbers instructions that we will provide below!


There is no wrong way to enjoy a Paint by Numbers kit as long as you follow the one instruction-- you’re free to experiment with the rules so that you can enhance your creativity and imagination even more. If you’re a first-timer to use this kit and want to play safe, then these comprehensive paint by numbers instructions are for you. In the instruction, we will be providing what you should prepare before painting, what you should do during the process, and the finishing touch-ups after painting. As promised, we will also give a handful of tips and tricks to make your canvas look better. So without further ado, let’s get started!
Painting by Numbers as Easy as 1-2-3!
Getting Started: Preparing for the Painting Process
You’ve probably received the Best Paint by Numbers kit by now and it’s time for you to get started by preparing everything you need for the painting. Preparation is important so that you don’t have to get up from the chair to get this and that, thus making the painting process more convenient for you.

1. Prepare the materials:
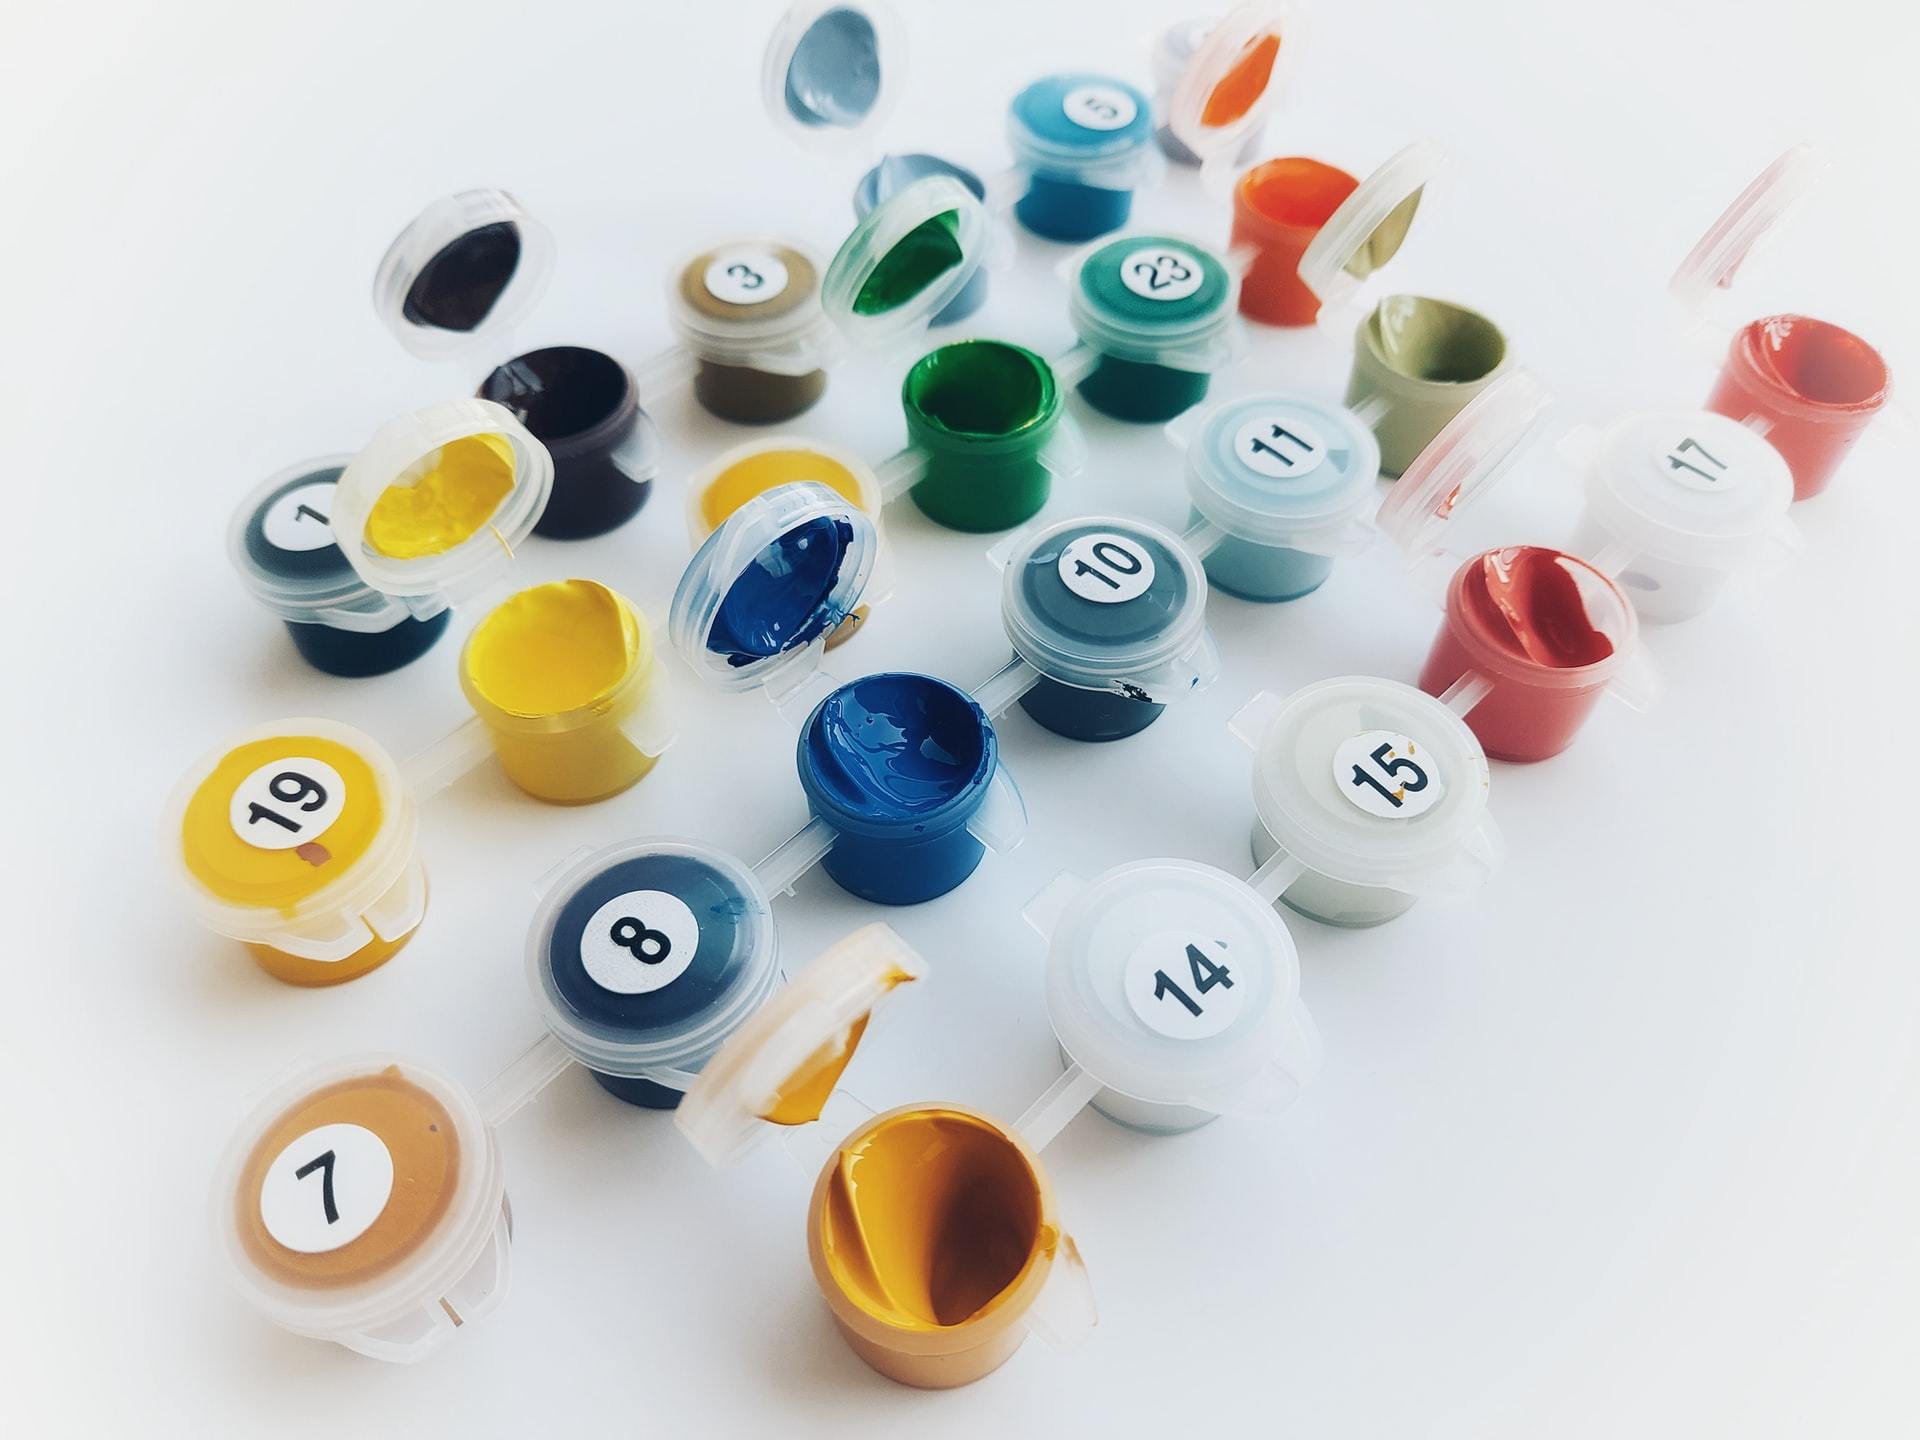
The kit contains a pre-printed canvas, a set of acrylic paint pots, and three basic brushes. The great thing is that there’s no need for you to prime the canvas or mix the acrylic paints because they're already primed and premixed for you. You only have to find a piece of cardboard larger than the canvas and some clip binders to attach the canvas to the cardboard. This will give you a sturdier surface to work on.
Once the main materials are ready, get two cups of water-- this will be used as a cleaning agent for your brushes during color transitions, as well as some paper towels or rags to dry your brushes.
2. Setting up your area:
Find a flat area (whether it’s a table, easel, or on the floor, it’s up to your preference) that has no clutters and has a good source of light. Be sure that your painting area has minimal distractions so that you can fully immerse yourself in the activity. That way, you can guarantee that you’ll have little to no errors at all due to distraction. Moreover, serene areas can help you concentrate, de-stress, and relax, which are some of the goals of a painting by numbers.
3. Clearing up your schedule:
Though this is completely optional, it would be best if you’ll paint on a day where you have no major responsibilities with little errands to run. If so, you can fully enjoy the painting experience for hours and for as long as you want. Don’t forget to take breaks, though!
The Painting Process

1. Start somewhere:
Looking at the canvas for the first time can be a little intimidating: there are so many spaces to fill! But of course, you gotta start somewhere. To make it easy for you, we suggest that you start painting this way:
- Start from top to bottom, going from left to right to avoid your hands smudging the paint.
- Paint using the darker colors first, then light colors for a seamless blending.
- Paint from the largest areas to the smallest ones.
2. Paint:
Start with one color at a time and don’t rush the painting process, just enjoy yourself. Follow these tips and tricks to make your canvas painting look better:
- Only open the paint pot that you’re using. Be sure that the rest are closed to avoid the pigments drying.
- Use a white correction pen to erase the number on the canvas if you’re using a light pigment such as yellow or white (be sure to remember the number, though!).
- Dip the tip of the brush lightly in the pot to ensure precision on your brushwork.
- Use only a small amount of paint because a little goes a long way already.
- Blend for a more aesthetically pleasing result.
3. Wait for the areas to dry before proceeding to the next ones:
To avoid smudging, it is best to wait for a few minutes before you proceed to another area and color. You don’t have to wait that long since acrylics are a fast-drying medium.
Finishing Up: Getting Your Canvas Ready to Display

1. Waiting time:
Before proceeding to the final steps, you need to ensure that your canvas is completely dry to avoid the paint from smudging-- you don’t want to ruin the masterpiece!
2. Framing the masterpiece:
Once the canvas is completely dried, you have the option to frame it so you can easily display the finished artwork anywhere in your home. You can do this by yourself or go to a shop that offers framing services.
3. Sealing the deal:
Though this step is completely optional, sealing or varnishing your artwork can prolong its life. It can also protect it from grime and dirt overtime. You can choose from three different finishes, depending on your preference-- glossy, satin, or matte finish. Either way, the application process of sealing your finished painting will still be the same.
The Takeaway
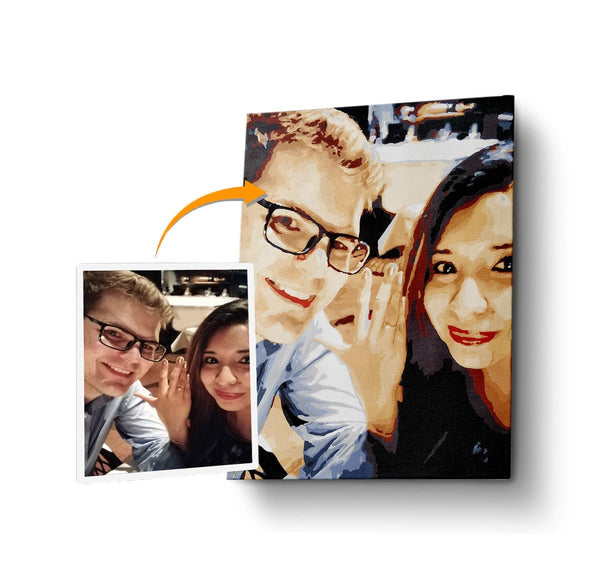
We hope that these comprehensive paint-by-numbers instructions can help you achieve the masterpiece of your vision. Slowly but surely, though one number and one color at a time, your vision will turn into a reality… something that you can display in your home and upload to your social media. So, what’s it gonna be? A portrait? Landscape? Or a Custom Paint by Numbers? Let us know!