Learn the Basics of Color Mixing and Brushstroke Techniques
Color mixing is one of the most intimidating lessons for beginner painters. However, knowing the color theory and also the color wheel, as well as a few tips and tricks will assist you to produce lovely artworks with beautiful color schemes. Moreover, it is important to know the basic brushes and their proper uses to maximize overall usage. If you are interested in learning these lessons, continue reading this article!


There are two not-so basic skills you need to learn as a beginner painter: color mixing and brushwork. You need to master these two in order to create beautiful artworks. Thus, having a guide in painting will give you ideas to experiment and bend the “rules” that can immensely improve your creativity with design. Moreover, knowing the basics will help you be the master painter you want to become. Remember, you need to have a solid foundation of art theories and other fundamental lessons so that you can apply that gained knowledge in later practice.
The Basics of Color Mixing

Basic Supplies
- Acrylic Paint
- Artist Palette
- Palette knives (or kitchen plastic knives can do)
- Cup (fill it with water)
- Tissue papers
- Acrylic paper (or watercolor paper that is durable enough and won’t let the paint bleed through the other pages)
Primary Colors:
All of us are pretty much aware of the three, basic primary colors which are red, yellow and blue. These colors cannot be produced through mixing, hence you need to buy these at the arts and crafts store. Since they can't be created on their own, these colors are the MUST-HAVES, together with White.
Red--Cadmium Red*
Yellow--Cadmium Yellow*
Blue-- Phthalo Blue or Ultramarine Blue*
White-- Titanium White*
(*) specific name of the color that you can buy at the arts and crafts store
Secondary Colors:
These are the results of two (2) combined primary colors.
Purple= Red + Blue
Orange= Red + Yellow
Green= Blue + Yellow
Otherwise, you can also purchase a ready-made acrylic paints at the local arts and crafts store
Purple-- Purple
Orange-- Cadmium Orange
Green-- Phthalo Green
Tertiary Colors:
These squares measure the mixture of a Primary and Secondary colours
Yellow Orange
Red Orange
Red Violet
Blue Violet
Blue Green
Yellow Green

More Tips and Tricks for Color Mixing
- Remember to keep a spray bottle full of water. Misting your palette can stop your painting from drying quickly.
- Have a cup (or two) of water beside you to make color transitioning during the painting process easier.
- Using tissue may also be useful in drying and cleaning your brushes faster.
When Tinting:
Tinting is the method of adding white to a pigment to make a lighter version of it.
- Start by adding a tiny amount of white to the pigment-- a bit goes a long way.
- If the specified color isn't achieved, add another paint, bit by bit till the specified color is reached-- you'll be able to add, however you'll never be able to take back.
When Shading:
Shading is the method of darkening a pigment by adding black or brown.
- Use a tiny bit of black whenever you are trying to darken a pigment. An excessive amount of black will make your paint muddy-looking.
- You can also use dark blue or brown as an alternative to black, this will additionally stop your paint from looking muddy as long the correct amount is used.
- To create a deep blue pigment, add a small amount of red paint.
When Toning:
Toning is after you add grey (by inter-mixing equal amounts of black and white pigments), or the other colors to desaturate a color. Toning is additionally used somewhat like an underpainting so as to attain a very realistic painting.
- Use Burnt Sienna (reddish brown) to make a rusty, orange effect.
- Use grey to cool down or neutralize colors.
- Use Yellow Ocher (mustard) if you would like a “bright light” effect on your painting (i.e. sunrise, sunsets)
Browns and Skin Tones:
- Mix all the three (3) primary colors to make Brown, a basic skin tone color.
- Add white or yellow if you wish to lighten the brown skin tone.
- Add a small amount of red to make a pinkish, blush-looking skin tone.
- Adding a small amount of blue will create the brown skin tone darker.
- Use grey to neutralize the color.
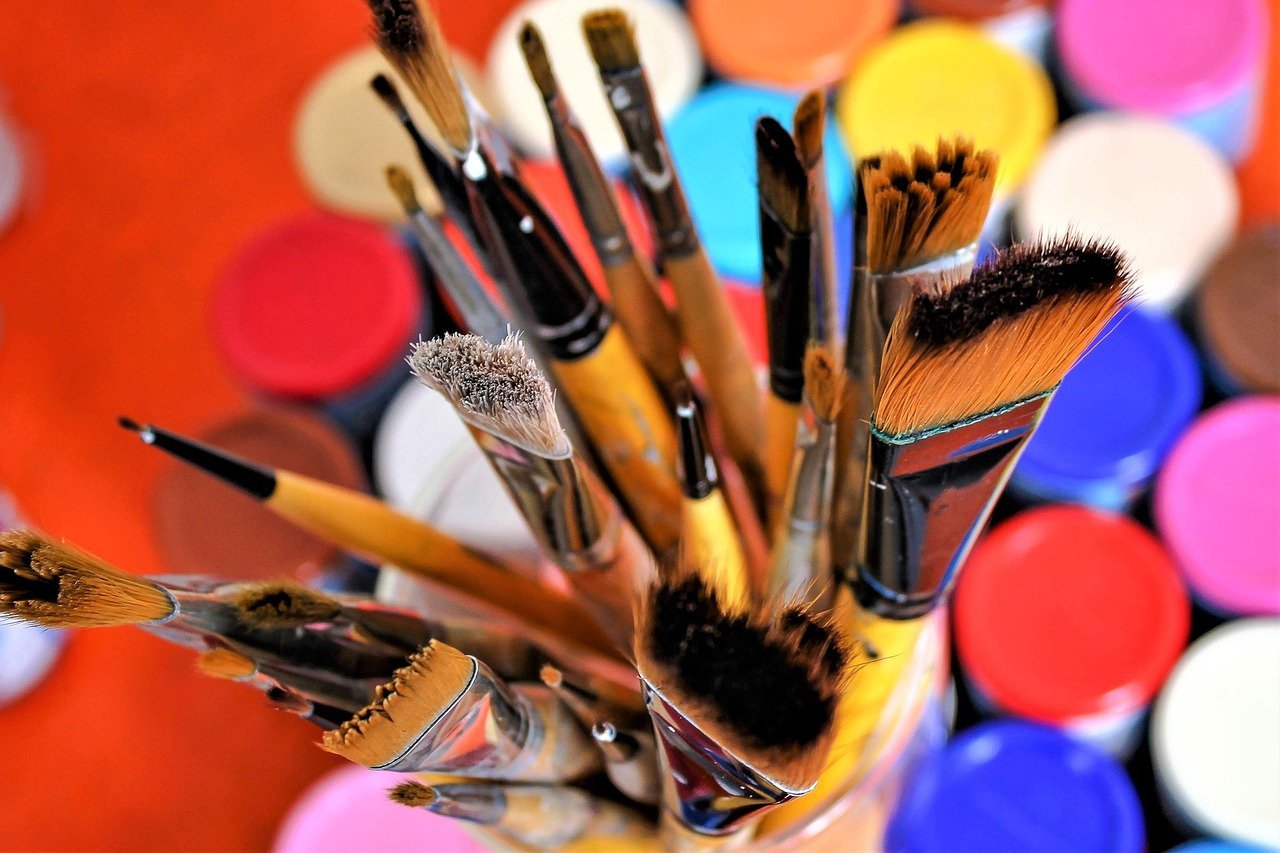
Basic Acrylic Brushes and their Uses

- Angled Brush:
Similar to a flat brush, it is good for painting curved places and hard to reach ends; shading, and it can also be used in the way you use a flat brush.
- Flat Brush:
This brush is rectangular in shape, it holds a lot of paint and is ideal for painting in areas where you need washes, thick strokes and full coverage. This brush can also be used for varnishing.
- Fan Brush:
Thin-haired and spread into the shape of a fan, this brush is good for creating textural effects in painting, especially in objects like clouds, leaves, etc.
- Round Brush:
Thin-haired and spread into the shape of a fan, this brush is good for creating textural effects in paintings, especially in objects like clouds, leaves, etc.
- Detail Brush:
A smaller version of a round brush, shorter in length; typically used for fine areas that require details and intricate designs.
- Filbert Brush:
Flat and oval in shape, it is good for painting round edges, blending areas, detailing and covering medium to semi-large areas.
- Round Pointed Brush:
Similar to a Round Brush but it has a pointed tip and a narrower bristle. Useful for spotting, coverage of smaller areas, fine details and sketching thinner lines.
